 |
|||||||||||||
How to remove ceramic tiles, bathroom renovationThe next job is to remove ceramic tiles from the floor and walls of the old bathroom . Removing Old Floor Tiles
So as detailed on the previous page in all of my tile removal work I used the fairly cheap and dusty dry method.
The floor itself was drummy. By this I mean that it was no longer solid.
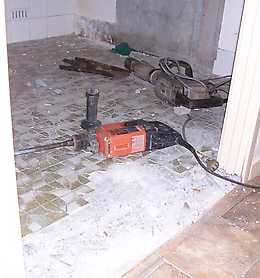
After a few hits with the Dyna drill I soon found out that it wasn't the old bathroom floor tiles that were loose, they were really solid, but the old cement topping was loose onto the main concrete floor.
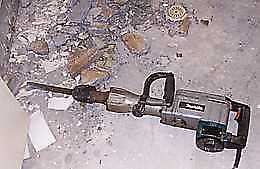
My small Dyna Drill was a bit small and underpowered so I had to get the larger Makita breaker out, and that lifted up the tiles and topping easily, leaving a fairly clean and flat concrete surface. The topping was about 40 thick at it's thickest. It is always a trade off between time and cost when you are trying to decide whether to go and hire a larger machine if the small one is taking too long to do the job. I almost always go for the right tool to do the job. This sort of work is hard and dusty enough, without prolonging it. Removing The Old Wall Tiles and The Old Baked Enamel Bath
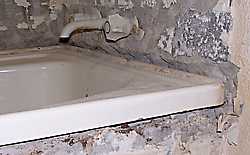
If you are lucky with wall tiles you may get them all off with just a brickies bolster, a smaller cold chisel and a lump hammer. It really depends on each particular job. As I said about the floor, the tiles were fixed well but the topping came up easily. The same thing could have happened on the walls, but lukily most of the plaster was firmly fixed and the tiles were tight too so I had to use the small Dyna drill with a chipping chisel in it. I removed all the old ceramic wall tiles but the wall surface was very patchy. Some of the old glue came off with the tiles and some stayed behind. I pulled the old taps off using a cheap box spanner as my socket set was just too thick to undo the retaining nut. Look in the plumbing section of your store (where you might be buying your new taps,later)and they will have cheap box spanners that are made just for this type of plumbing renovation work. The next job was another bit of a struggle, removing the old bath, which was a standard pressed metal one, with a baked enamel finish. It had a couple of small chips, where something had been dropped into it, and the bottom surface was worn and looked faded, so I had to replace it.
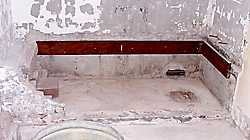
Where baths are against a wall, they are set into the walls, either masonry or stud walls , about 20mm, so that the wall tiles can overlap the lip on the bath. Most of the cement mortar around the bath came loose and I removed it when I was chipping the tiles off. It was still locked in solid though, and I had to remove the brickwork in front of the bath. I punched a decent sized hole in it with the Dyna drill, then got the rest of it out with a lump hammer and a cold chisel. After getting the front wall down, I was able to slide the bath sideways and roll it out. In the photo at the at the very top of this page, at the top left of the photo can be seen part of the short wall that supports the bath, and in it is a slotted vent tile. In the bottom photo you can see at the bottom right a hole in the outside wall which has a slooted vent (not seen here) also. These two vents were used to vent the space under the bath, to aid in stopping condensation. They definitely work, but the modern trend is not to use them anymore. In fact it is all part of what the suppliers dictate to us builders. They no longer make them to suit particular bricks or blocks for the outside, and they certainly don't make them for vast range of ceramic wall tiles now available. So the new bath was fitted without one on the inside of the bathroom. The outside one remained untouch though.
You can also see that brickwork has been built up, to suit the length of the bath. I left that intact, as I was going to use a new bath that was the same size as the old one. Also plainly visible are the pieces of hardwood timber that are there to support the edges of the bath level while the rest of the building in process goes on. I checked them, and they were still level and solid so I used them again. There is no doubt that the reason that they were still in good condition was in part due to the previously mentioned air vents. If you didn't find exactly what you are looking for try this search tool that will search the site and the web. |
Hire Equipment  Furniture Fittings - Architectural Hardware - Electronic Locking Systems - Technical Hardware BuilderBill sponsorship |
||||||||||||
|
|
|||||||||||||
|
Please Note! The information on this site is offered as a guide only! When we are talking about areas where building regulations or safety regulations could exist,the information here could be wrong for your area. It could be out of date! Regulations breed faster than rabbits! You must check your own local conditions. Copyright © Bill Bradley 2007-2012. All rights reserved. |
|||||||||||||


