 |
|||||||
new bath fixing, bathroom renovationThe new bath: fixing it into position.
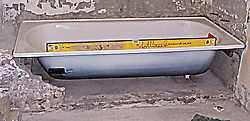
At the right I have slipped the new bath into position and it is just sat on top of the two hardwood timbers seen in the previous page.
I was lucky in that I could get a new bath with an identical layout so that my new outlet fit nicely into the existing waste pipe.
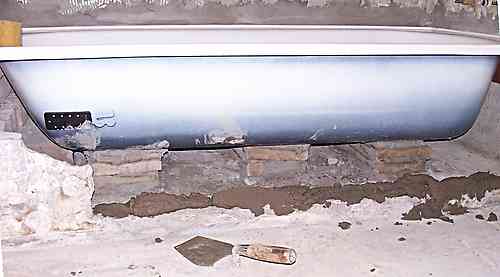
Here's the new bath set into position.
When baths are just sitting on the outer rim they feel and sound hollow. The bath manufacturer's blurb says to support around the perimeter, with no mention of underneath support, I have never seen a bath put in without support underneath. In this photo I have just laid a bed of mortar to start bricking up the front of the bath. The trowel I have laid it with in the foreground is a brickies trowel that has the pointy end cut off with a grinder. This makes a nice tool for mixing and getting mortar and tile adhesive out of mixing buckets. When laying out the wall I allowed 10mm for plaster, 8mm for the tile and and another 3mm or so for clearance, between the face of the wall and the inside rim of the bath that the tiles had to tuck in behind. This meant that I was OK to lay 400 x 100 x 100wide cement blocks to start of with, and then I had to cut some of them narrower at the top where the bath curved out. This worked out fine, with the tiles fitting up under the rim nicely. I sealed the joint afterwards with white silicon, but that was just for cosmetic reasons as the bath rim overlapped the tiles by 20mm or so. If you didn't find exactly what you are looking for try this search tool that will search the site and the web. |
Hire Equipment  Furniture Fittings - Architectural Hardware - Electronic Locking Systems - Technical Hardware BuilderBill sponsorship |
||||||
|
|
|||||||
|
Please Note! The information on this site is offered as a guide only! When we are talking about areas where building regulations or safety regulations could exist,the information here could be wrong for your area. It could be out of date! Regulations breed faster than rabbits! You must check your own local conditions. Copyright © Bill Bradley 2007-2012. All rights reserved. |
|||||||

