Laying the mortar bed or topping to a bathroom floor
The bathroom floor at this stage is flat so I have to lay a cement topping to give it the correct falls to the floor waste.
Preparing The Old bathroom Floor For The New Cement Topping, Scabbling
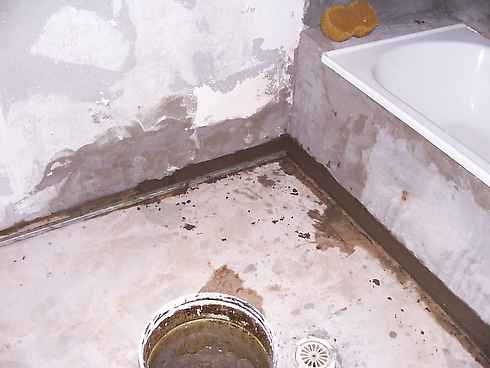
After the touch up plastering the next job was to clean up the floor and lay a bed of sand and cement topping. A quick scrape around with a shovel removed most of the rubbish on the floor and it was looking quite clean. Of course this quite clean floor was what the existing topping was laid on, and that one was drummy, it was not bonded properly. I needed to scabble the floor. That is to get the old floor into a state where the new sand and cement topping will bond onto it.
- If I had no power tools on hand to do the job, I could have gone to the hire shop and got what is called a floor scabbler to do the job. Usually air driven (so you need to hire a compressor
also), they consist of a few rotating jack hammer/rock drill type heads on a carriage. They are great for scabbling large floors, but a bit of overkill for a small bathroom.
- There are a few other air operated tools that would do the job, like the hand held bush hammers or needle scabblers, but I had my own tools that could do the job.
- I could have chipped away all over the old surface with a chisel bit in my rotary hammer drill. Tedious but effective.
- Or the option that I chose, which was grind away the surface slightly with my large angle grinder with a diamond cup disk in it.
- Another way is to acid etch the bathroom floor. That is to use diluted Hydrochloric acid (Muriatic acid) on the old
surface, to eat away the surface of the cement and
contaminants. This would have been very easy, but I am always a
bit wary of using acid indoors, especially in a bathroom with poor
ventilation. If you acid etch concrete you need plenty of water handy to rinse the residue away.
Those are a few ways of providing a mechanical key. Of
roughening up the surface so that the new concrete, or cement mortar in this case, can bond onto the old concrete.
In addition to to roughening up the surface, the bond between the old and new can then be increased by using the so called chemical keys. I'll be dong this as well, because the topping will be quite thin, going down to about 8mm only at the floor waste.
- The one I am using here has already been described, using Bondcrete as a primer and also in the cement mix.
- Another excellent way of bonding old to new concrete is by using epoxy. I have done quite technical
jobs where we poured the new concrete onto the old, using an epoxy that was hydrophillic (water compatible).
The old concrete was coated with the epoxy and then the new was poured while the epoxy was still
wet.Of course this was in a critical application, hardly a residential bathroom.
So after checking that the floor waste still had a plug of towel in it to catch debris; I bit the bullet, put on my ear muffs, dust mask and visor and gave the floor a good run over with the diamond grinder.
Back to top
Cement Topping, Falls To Floor Waste
- I decided to use only a 20mm fall from a level line all around the walls down to nothing
at the 100mm floor waste. The bathroom is so small that the 20mm is plenty. The floor was level all around, so all I had to do was make the topping
an even 20mm at the the walls and door, falling to nothing at the waste.
- Once again I used my Bondcrete primer, and Bondcrete enriched sand and cement mix for the topping.
- I used my own "make it easy for me" method that any of my tiling or plastering mates would surely laugh at if they saw how I was doing it. Definitely not fast and good like they do. More like slow and rough, but I was happy with the end result.
 |
| Bathroom floor - laying a 20mm strip of mud around the perimeter to screed to. |
- I had a couple of odd lengths of 20 x 20 RHS steel on hand, and I used them to help lay a 50mm wide strip
of cement all around the perimeter walls. Then patting myself on the back I cleaned up and
had an extended "Smoko" (Aussie for tea or coffee break).
- After about an hour the strip was quite firm, so I could get on with laying the falls.
- At the door I had already fixed a 20mm aluminium angle to the floor to form the edge and to give me
something to screed off.
- I used a few aluminium screeds of different lengths to allow me to level off between the wall strip,
the door angle and the 100mm PVC pipe floor waste. Working out of the room backwards.
Again I left it a touch higher and rougher, not playing about with it too much, to be able to scrape
it off later when it was quite firm.
 |
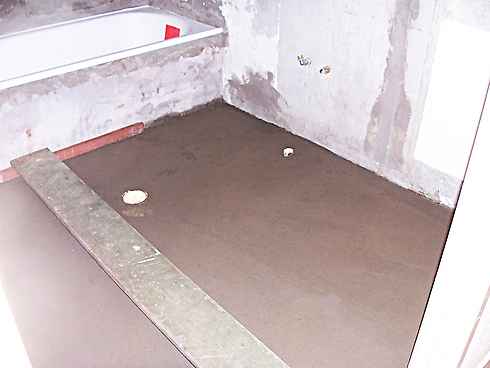
| Bathroom floor - Mud filled in from the perimeter to the floor waste. |
When I scraped it off, the topping was still not hard enough to walk on, so I had to put a plank
across to work off. The end of the plank against the bath had a bit of timber nailed to it to
keep it above the surface. That rested on my first laid 20mm thick strip which by this time was hard
enough.
 |
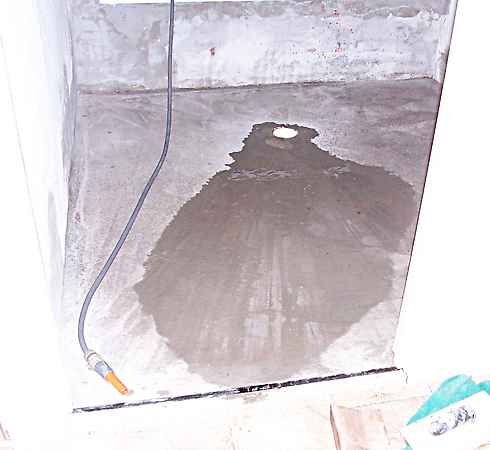
| Bathroom floor - Checking the fall. |
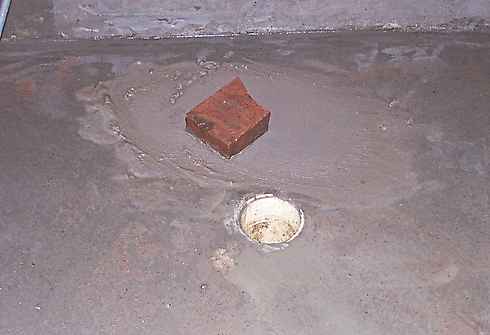
The following morning I watered the bathroom floor down with a hose to check the falls and also to aid curing. I tried the surface for straight and found a small bump (under my plank area) which I rubbed off with a half brick and water.
 |
| Bathroom renovation - Rubbing down a small high spot with half a brick. |
If you didn't find exactly what you are looking for try this search tool that will search the site and the web.


