 |
||||||||||||||||||
Intro to Small to medium electric drills.
General pointsAh ---- Electric Drills, Another Good old Aussie Invention!
Small Drills 6.5mm to 10mmThe size of a drill is the largest size drill bit that the chuck will take. a 10mm drill will take a 10mm drill bit at the shank, and no larger. The smallest are ideal for pop rivets and pilot holes. Pilot holes are the small hole you need to drill before you drill a larger hole. (It has to be slightly bigger than the end of the larger bit before the flutes start). Or of course you may drill a pilot hole for a screw. They rev at a fast 4,500rpm. Generally a smaller drill bit has to rev faster than a larger bit to get the same cutting speed.
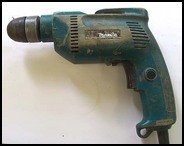
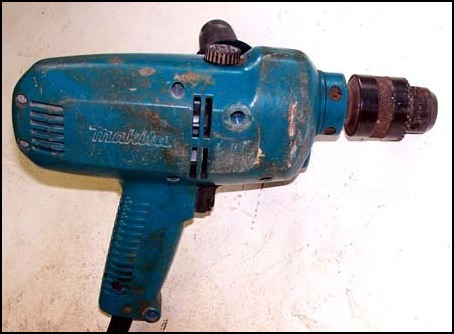
The one pictured is a 10mm, with a 10mm keyless chuck drill chuck. It only revs at 2,500, but I chose it because the larger chuck would be more useful, The variable speed and reverse are also handy. I still use it mainly for pop rivets though. The chuck is worn smooth through drilling too close to corners, but there is still enough grip tighten it if I grip the chuck first with one hand and then give the trigger a blast with the other. Here's a tip. If you have to drill so close to a corner that you might damage the paint with the chuck, slip a bit of thick cardboard or skinny ply between the wall and the chuck. More on Medium Sized Power Drills
Drilling with a drill press setup has a few advantages over drilling by hand. It is easier and safer to use for drilling small work. A purpose made drill press vise, or a hand clamp will hold the work securely. Repetition work is easy to set up. A drill press drills true vertical holes. Hand held are never as true. Safety tips for Medium and larger drills.
A few drilling tools
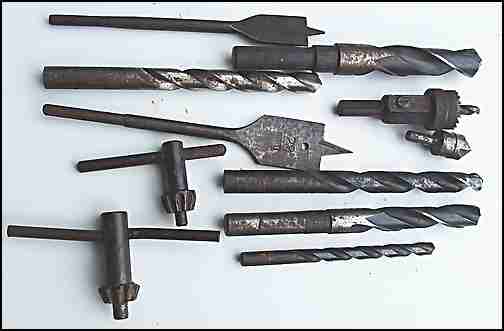
Here are a few types of bits and what I use them for. This list is by no means complete, just some of the ones I use.
Auger bits
Traditional timber auger bits, but with a machined shank for power tool use. Great all rounder, drills long straight holes in timber.
Masonry bits
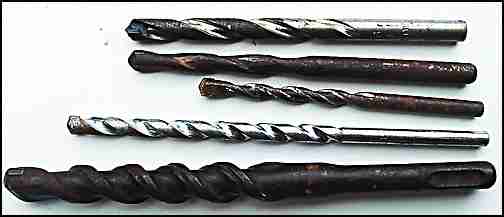
The bottom bit is an industry standard type end fitting and as such fits different brands of drill. More to the point you can buy generic ones that are cheaper than the brand name originals. All these are TCT tipped masonry drills, for use with the hammer setting. For concrete and masonry fixings. I have not got a depth stop on my drill so sometimes if I have a few holes to do I stick a bit of masking tape on the bit as a depth guide. Hole saws
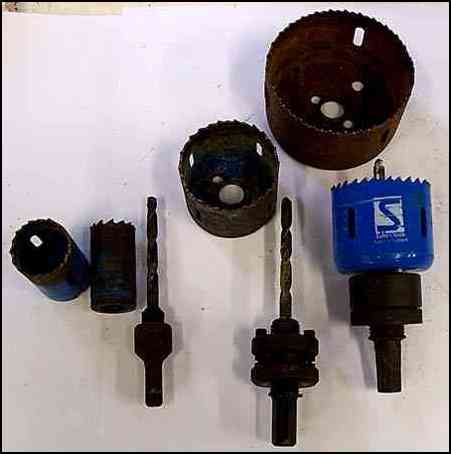
These saws are HSS for steel, timber, and plastics etc. The hole saws that come in a kit all nested together around one mounting are hopeless for buiding type work. They always break and let you down. When I have a hole through, say 5mm steel to do, I use a drilling/cutting compound, keeping the blade cool and slow revs. For timber, like the 2 1/4" lock holes in solid core doors, I keep pulling it out and cleaning off the sawdust, they seem to clog up fairly quickly. When the pilot bit has gone through the other side of the door, I drill from that side to finish the cut. Tree bits
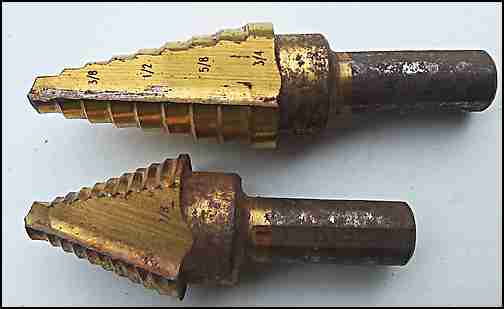
When these first came out we thought they were magic, and they were compared to the alternative.
When they get a bit dull they are always better with a pilot hole first. (Or a sharpen, but they never seem as good as new) . They seem to do a series of burps as they go to bigger holes. They don't replace all the drill sizes they have stamped on them, but they sure make it easier a lot of times. The gold coating on these and other bits that you see, is supposed to make cutting steel easier, longer between sharpenings --- maybe in perfect conditions, hard to tell. Sharpening BitsI have never had a sharpening jig for HSS metal drill bits, twist drills, but I have worked with guys who have and they swear by them. Very quick with exact angles. I should go and check them out, as I admit that my eyesight is getting shot.I always study the tool I am sharpening and try to copy the way the maker intended it to be. Don't increase the angles thinking you'll get it sharper. You may do but it will dull a lot quicker For HSS metal twist drills I use a fine stone in a bench grinder, keep a container of water handy and grind very lightly, cooling down the bit often in the water. If you look at a new bit you will see that the clearance angle behind the cutting edge is a curve, starting off at almost nothing. Try to keep that curve, the thick edge right at the cutting point is what gives the edge a resistance to chipping. When you are sharpening as you lightly touch the wheel and roll the bit to get the curve. Keep another bit handy to look at and copy as you go. It is easy to lose the plot completely otherwise. Using a bench grinder to sharpen bits with your hands close to the wheel is potentially dangerous so please follow safety guidelines. Sharpening carpenters flat bits, twist bits and auger bits is easy. Put the drill bit in a vise or clamp it, keep to the same angles and a few strokes with a fine, flat hand file should do the trick. Not found it yet? Try this FAST SITE SEARCH or the whole web |
Hire Equipment  Furniture Fittings - Architectural Hardware - Electronic Locking Systems - Technical Hardware BuilderBill sponsorship Power tool related pages
|
|||||||||||||||||
|
|
||||||||||||||||||
|
Please Note! The information on this site is offered as a guide only! When we are talking about areas where building regulations or safety regulations could exist,the information here could be wrong for your area. It could be out of date! Regulations breed faster than rabbits! You must check your own local conditions. Copyright © Bill Bradley 2007-2012. All rights reserved. |
||||||||||||||||||
