An overview of diy decorative concrete
While the title of this page is "diy decorative concrete" I am not for one minute saying that a complete amateur can just dive in and do any or all of the techniques that I will be talking about here. I would say that anyone who has poured and finished a few concrete slabs successfully may well be able to handle any of these finishes here and on other pages in this series.
More to the point, you may be a homeowner like one of my recent visitors who is looking for something different. No doubt you have seen plenty examples, but just about every site on the web seems to be pushing their own product and method, and hey, aren't there plenty of them?
It is my hope that I may be able to explain the pros and cons of the various decorative concrete finishes to you and at the same time stir up your creativity to try something different.
It should be noted here that all of the techniques that change the colour of either the whole of the concrete or just the surface, should be well planned and executed. Particular attention must be paid to protecting other floor areas or nearby walls from contamination by the dyes, stains or ochres in the new wet concrete. These products almost impossible to remove when slopped in the wrong place.
Tip - Standard plastic sheeting is a good protection, weigh it down or tape it. A great product and cheap as well are the rolls of stretch cling wrap plastic called pallet wrap. As the name implies they are used mainly to wrap goods on pallets and they come in 600 wide rolls. The plastic can be applied to walls and floor edges using a roller frame like a large paint roller. It can cover all the odd angles and vertical surfaces.
Traditional forms of decorative concrete?
Since the time of the Romans concrete has been a basic construction material. That's the word: BASIC. You had concrete and left it as it was, grey. If you didn't like it then you added the extras to make it look good, but the basic concrete itself remained unchanged. A couple of ways that have been used to decorate structural concrete are described below. Remember though that they are added after the main structural concrete has set. They are separate processes.
Mosaic
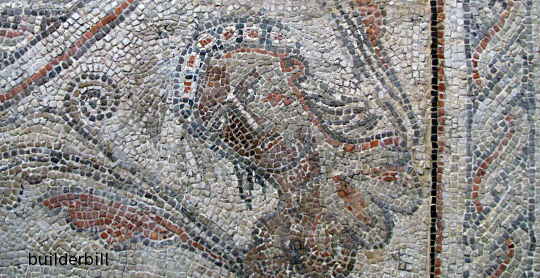 |
| diy decorative concrete - A part of the Thruxton (UK) Bacchus Mosaic. This floor dates back to the fourth century A.D. |
- Probably the oldest examples of adding decoration to concrete come from the Romans and their beautiful mosaic floors. The example above was on display at the British Museum.
- Curiously enough this decorative technique is still popular today and it is well within the capacity of the diy. Just a few doors down from where I live one of my neighbors has a small floor mosaic to her entrance. It is totally unique, obviously done with care and passion and it lifts a mundane front entrance into something special. Everyone who visits the place can not fail to remember it.
- Small chips of glass, glazed pottery or broken ceramic tiles are laid in a bed of wet cement
- The process is similar to laying small ceramic tiles which in themselves are a way of improving the looks and durability of plain concrete.
 |
| diy decorative concrete - Part of an aboriginal artist designed modern mosaic floor depicting the milky way. This is a small section of a floor that is about 5M square. |
Terrazzo
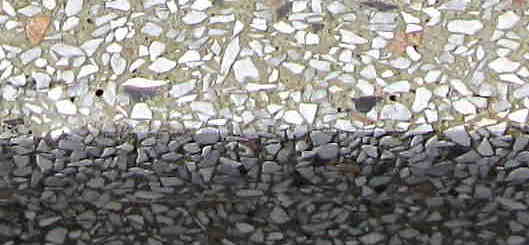 |
| diy decorative concrete - Terrazzo. A small section of an outside stair that is at least 60 years old. |
- Another old example of decorative concrete is the use of Terrazzo. Again the Italians have been using this technique for centuries and they have taken it to most parts of the world.
- I have seen many fine examples of Terrazzo work by Italian migrants to Australia over the last 40 years or so.
- The basic system was to lay a thin (25 to 50) topping of concrete on top of existing concrete.
- The topping consisted of various colours and smaller sizes of stone chips set in cement, sometimes with thin wire rebar or mesh to reinforce it.
- The topping when set was then ground down to a smooth surface by the use of air operated carborundum grinders of various sizes and shapes, exposing the aggregate.
- The grinding work was noisy, dirty and because it was invariably using water, then it was messy.
- On larger floors part of the skill of the work was in laying out brass dividing strips to create different areas of colour or design.
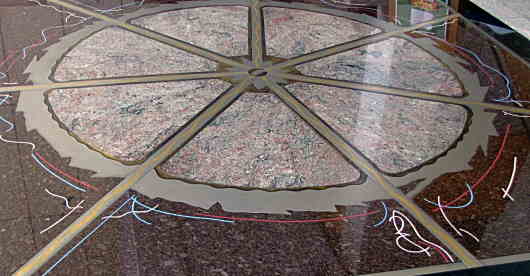 |
| NOT diy decorative concrete - A modern highly polished epoxy based terrazzo floor containing brass inserts, coloured aggregate chips, pure coloured epoxy resins and hand painted epoxy. |
Back to top
Modern methods of creating decorative concrete effects.
This is where things start to get interesting but at the same time complicated. There are many different methods and interesting possibilities for using combinations of different mix ingredients and different surface treatments.
What follows will be a list of my take on the various subjects, some of them I have had experience with and I will go into detail on upcoming pages. Check back here to see the links appear.
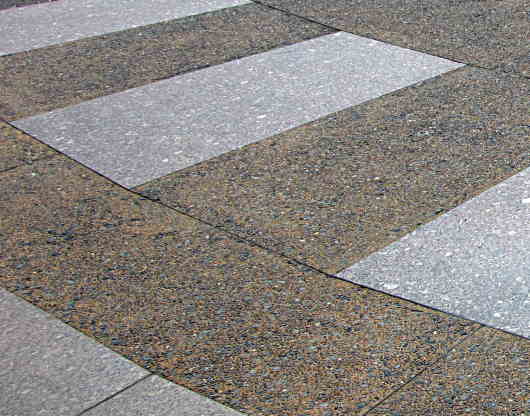 |
| diy decorative concrete - Exposed aggregate and polished concrete panels in an outside courtyard area. |
Standard concrete with decoration added before the final set.
By this I mean house floors, driveways or footpaths and such that are formed with the rebar installed, and then in a single day the concrete is poured, allowed to take on it's initial set, and then various techniques are applied to the still semi-hard or "going off" concrete.
Because these methods are all completed in one day they often are not a lot more expensive than standard concrete, which you may have to have anyway. The same team that lays the main concrete may leave just a couple of guys behind to apply the finish.
As you can guess, timing, good organisation, good weather, the right equipment and at least a few knowledgeable people are critical to the success of these methods.
In all cases the concrete is laid in the normal way, with correct expansion joints, screeded level and finished to a smooth flat surface. The base must be just about as good as it should be if nothing else was being done to it. No decorative method will cover up uneven or badly laid concrete.
In some cases the concrete is spray sealed at the finish of the day's work, making normal curing methods unnecessary.
- Stamped concrete, PIC or Pattern Imprinted Concrete
- This technique has been around for years and it consists of first going over the surface of the concrete and tamping down the larger particles of aggregate while the concrete is still in a plastic state. Then when the concrete begins to firm metal frames are pressed or stamped into the surface to achieve various looks like imitation slate, cobbles or bricks. Most times ochre or other colouring is dusted onto the surface and trowelled in prior to stamping.
- Stencilled concrete
- Waxed paper stencils are laid on the wet surface and various proprietary coloured polymer and cement based powders and liquids are then applied over the whole surface. When almost set the stencils are removed showing a pattern of the base concrete and texture. Many complicated patterns are available.
- Exposed Aggregate
- After the initial troweling a retardant liquid is sprayed onto the surface. At the correct time a water blaster is used to wash away the sand and cement fines on the surface and expose the aggregate of the concrete mix. There are many possibilities of including colour or variegated aggregates to the initial concrete mix. More often though standard mixes are used with smaller maximum aggregate sizes. Say 10mm or less.
- Surface colouring
- An old method was to mix coloured ochres with cement and dust it over the moist top of the concrete and then trowel it in to create not only a different colour but also a harder wearing finish.
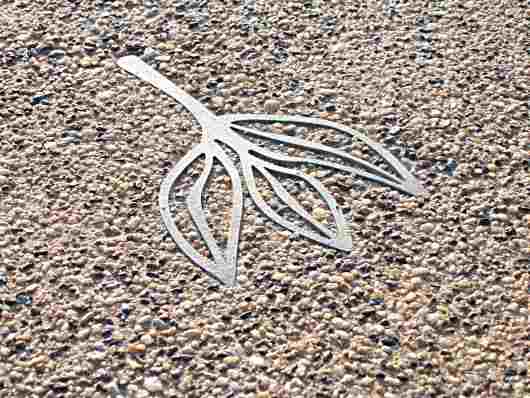 |
| diy decorative concrete - A stainless steel plasma cu insert in a river gravel exposed aggregate footpath. |
- Metal Inserts
- Above is a stainless steel insert. It has lugs welded on the underside to hold it into the slab. This is in my opinion a great DIY decorative concrete technique. All you have to be able to do is produce a line drawing of your design and take it to your steel supplier. They will do the rest. The cheap and efficient plasma cutter services provided by steel merchants make great possibilities for creative designs. You may have to get lugs welded on elsewhere, but then all you need to do is tell the concreter (if it isn't you) where you want it placed. 99% of the work may be done by others, but anyone can have artistic input to make something that is no longer run of the mill.
- Scatter on, or seeding concrete
- I honestly don't know if there is even a correct name for this method, but it consists of randomly throwing chips or pebbles etc. on top of the base layer. These can be decorative coloured granite chips or washed river pebbles that that are either too expensive or impractical to use in the whole mix. After scattering, the material is either rolled into the surface or trowelled in. Being in this section, later in the process it will be exposed by water blaster. (This technique is also used to great effect in polished concrete also).
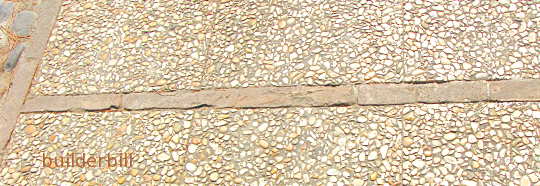 |
| diy decorative concrete - River pebbles seeded into the top of a slab and then exposed. The separators for the panels are old clay bricks. |
A couple of web friends of mine (ain't the Internet just great?) have a really informative site.
For some good ideas for concrete flooring for your porch, visit Dave and Mary's Front Porch Ideas site.
This page is getting too long, it was only intended as an introduction of the subject, so anyway my NEXT intro page will cover:-
- Decorative elements added to the mix.(prior to grinding)
- Concrete grinding and polishing the process and the tools
- Concrete polished floors
- Concrete counter tops
- Old concrete decorative resurfacing
Leave this diy decorative concrete page and back to concrete basics.


