 |
|||||||||||||
Using a Coping Saw to Fit a Timber CorniceCoping SawsA coping saw is cheap and they are brilliant little tools. Cheap to buy and cheap to run. They have fine teeth, typically 15 per inch, and can be used to cut timber and plastic. No sharpening required, just buy a packet of blades and you are right for ages. They are the only tool for many jobs. They are capable of very fine work and for what I am talking about on this page, which is cutting the joints for a timber cornice, they have not yet been replaced by a power tool. Just a quick point. When you get your coping saw with a blade already fixed, it could be set in the frame either way, to cut on the pull stroke or the push stroke. I have always set the saw blade so that the teeth cut on the pull stroke. That is, the teeth point towards the handle. The blades are very thin and cutting on the pull stroke saves them from breaking easily. The coping saw blade hooks onto a rotating spigot at each end of the frame. These spigots allow the blade to be angled to suit the cut you want to make. For example you can drill a hole in a piece of timber ( or plastic etc.) and then fit your blade through the hole and enlarge it to whatever shape by rotating the blade. If I had to fit a lot of timber cornice similar or larger than the one pictured below, especially if it was hardwood and going to be clear finished (heaven forbid, I'd probably cry off and claim my knees are not up to the ladder work any more). I would have a really sharp gouge and chisel handy to trim up any inaccuracies. For ordinary paint finish work using softwood, off the saw is usually OK. (Plus of course a bit of the old carpenter's helper, which used to be putty, but is now a caulking gun of acrylic gap filler :-). I belong to a woodworking forum and the other day a guy asked a question about scribing the joints on timber cornice. A guy who goes under the user name of Rat52, who was a sub contact carpenter for many years and is now a construction foreman on commercial sites, answered a question about cutting scribes in a timber cornice with a series of posts and an excellent set of photos. Rat52 has given me his kind permission to use them here. Thanks mate!
Leave this coping saw page and go back to trim carpenty. Not found it yet? Try this FAST SITE SEARCH or the whole web |
Hire Equipment  Furniture Fittings - Architectural Hardware - Electronic Locking Systems - Technical Hardware BuilderBill sponsorship Other Carpentry and joinery related pages.
|
||||||||||||
|
|
|||||||||||||
|
Please Note! The information on this site is offered as a guide only! When we are talking about areas where building regulations or safety regulations could exist,the information here could be wrong for your area. It could be out of date! Regulations breed faster than rabbits! You must check your own local conditions. Copyright © Bill Bradley 2007-2012. All rights reserved. |
|||||||||||||
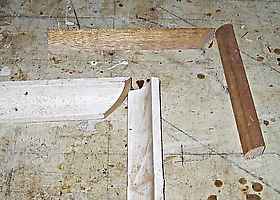 Here is a photo showing two different sections, one a quad, (quarter round) and the other is a cornice
that is about 40mm. The pieces on the right have square ends and the pieces on the left have the first
stage of the scribe joint, an ordinary 45 deg. miter cut.
 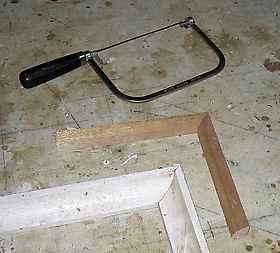 The two pieces of timber to the right have been left untouched, still with the square ends, but
the pieces on the left have had scribing cuts done along the line of the miter with a coping saw
to make the scribed shape.
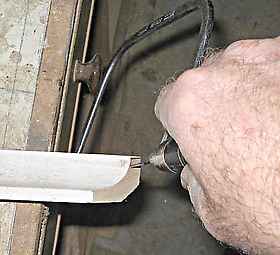 Here we see Rat52 cutting the actual scribe. Notice that he is not cutting square to the surface, but he
is putting a definite undercut to the joint. The angle of the coping saw blade shows he is cutting out
more material than is strictly needed. This way the front of the joint makes contact first and
is never held open by the back contacting first. That is, to make sure that you are not getting out of square the wrong way
you make a definite undercut. It doesn't matter that the back of the joint is open because it is not seen.
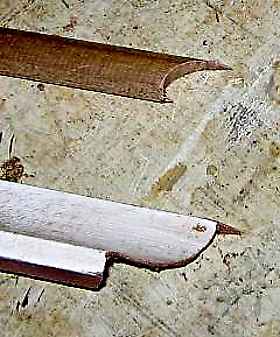 So this is a close up of the two cut ends. It is fairly usual to cut cornice like this on the job, with
a saw stool. Holding the saw with one hand and the material with the other.
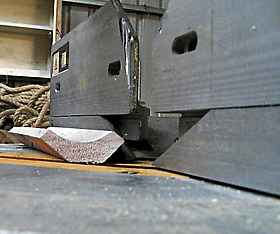 The original poster to the forum, was having difficulties with his miters, never mind the scribing
with the coping saw, because he was laying the material down on the saw bed like this.
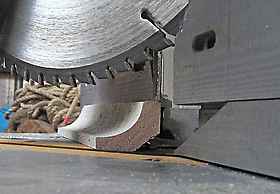 This is the way a small section should be put in relation to the chop saw.
 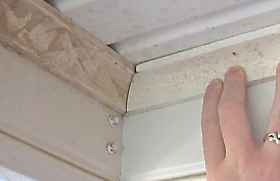 Here is the cornice held up in the final position, ready to be fixed.
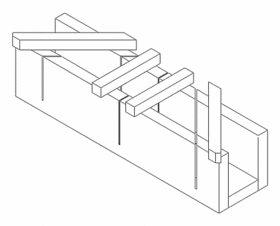 If I didn't have a power mitre saw handy, or if the particular section I had was just to
big to cut with the one I had got, I would make up one of these homemade mitre boxes.
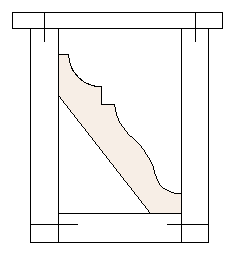 If I only had a few cuts of something odd sized to cut, like a large crown mold, or a tall skirting
board, I would make a home made miter box that fits the profile closely, to get repeatable cuts
all the time.